In this lesson, we’re going to continue building our website.
Today you’re going to:
Create a menu
Pick the color scheme for your website
Get a logo
Install most essential plugins
Let’s get into it.
Your 11-Day Email Schedule
- Day 1: Welcome to the 11-day Affiliate Course
- Day 2: How to pick a profitable niche
- Day 3: How to pick an affiliate product
- Day 4: Building Your Income-Generating Website
- Day 5: Building Your Income-Generating Website (Part 2)
- Day 6: Marketing Your Website: On-Page SEO
- Day 7: Creating Your First Content
- Day 8: Marketing Your Website: Off-Page SEO
- Day 9: How To Monitor Your Performance
- Day 10: Double Your Earnings With Email Marketing
- Day 11: Easy Wins While You’re Gaining Authority
Important* Make sure you have done all the previous steps
before going to the next lesson.
Resources Mentioned in This Lesson
- CSS Drive (Color Palette Generator)
- Fiverr (Freelance Market Place)
- flamingtext (Logo generator)
- Cooltext (Logo Generator)
- WP Plugin directory
Create a Menu for your Website
A website should be easy to navigate through.
The easier it is for website visitors to find what they’re looking for, the longer they’re willing to stay on your website.
This is why I’m going to show you the standard best practices for creating menus for your website.
Go to your WordPress dashboard and go to:
appearances ⇒ Menu
Here you’ll see the picture below which you can use to create all the menus you want to be shown on your website.
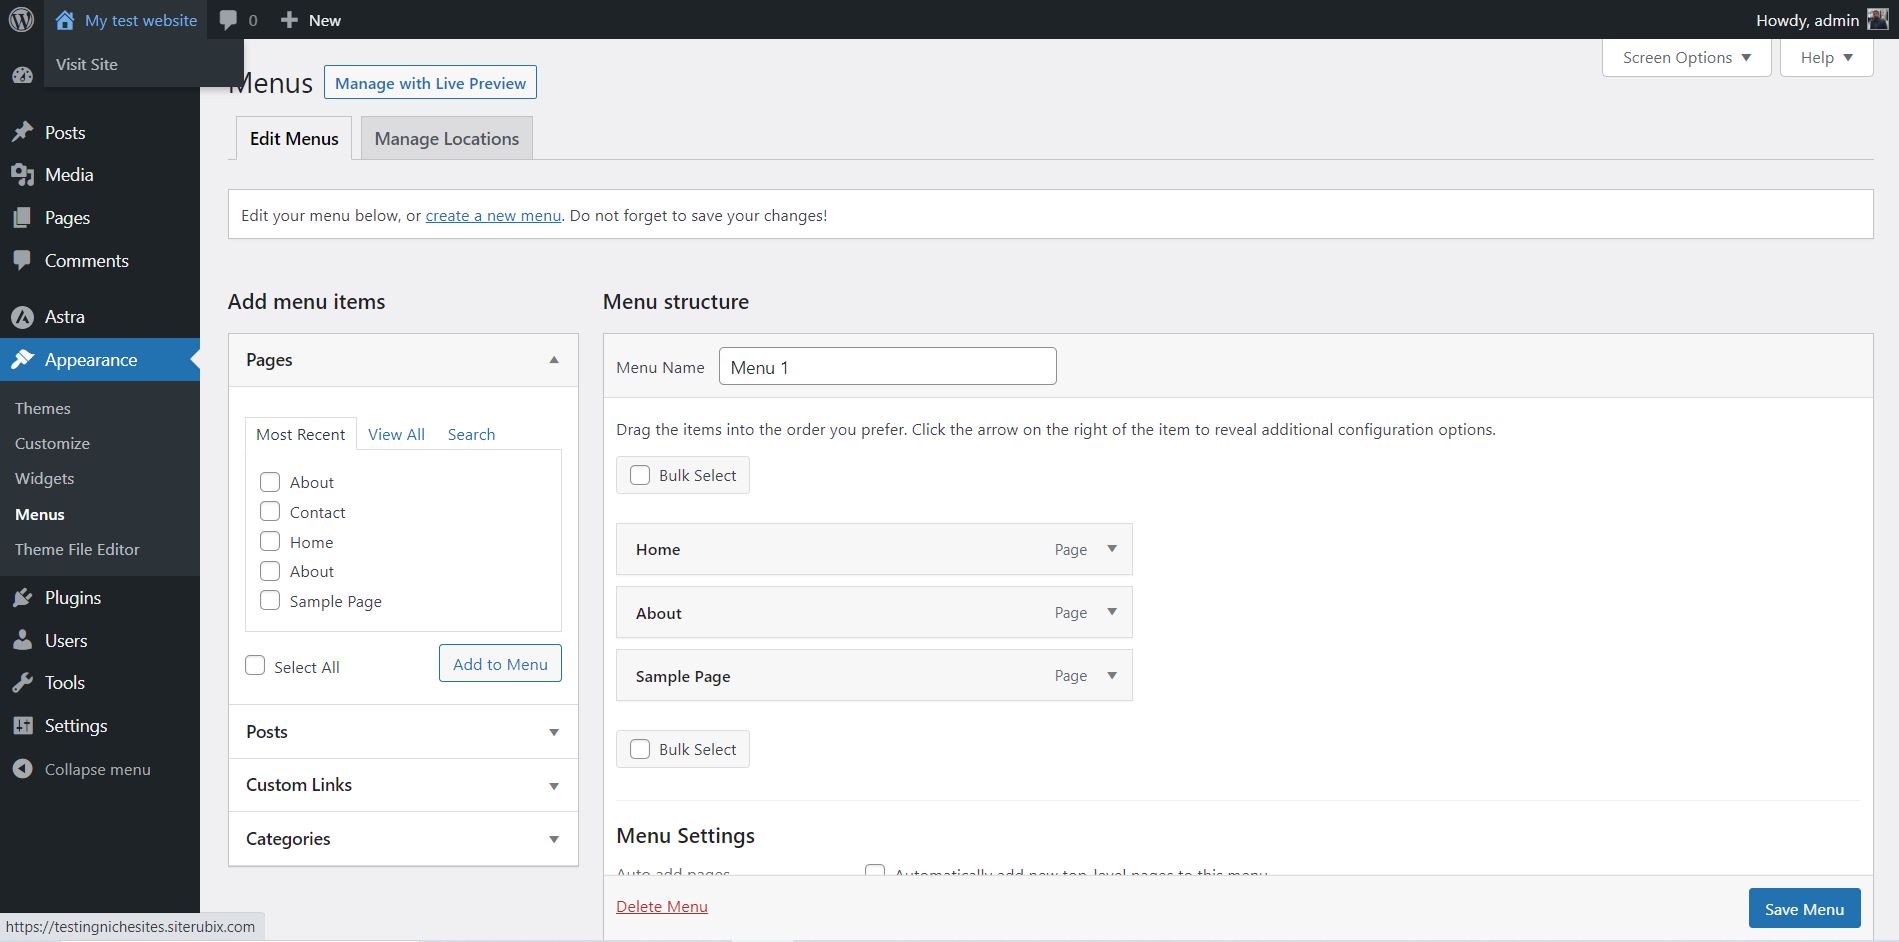
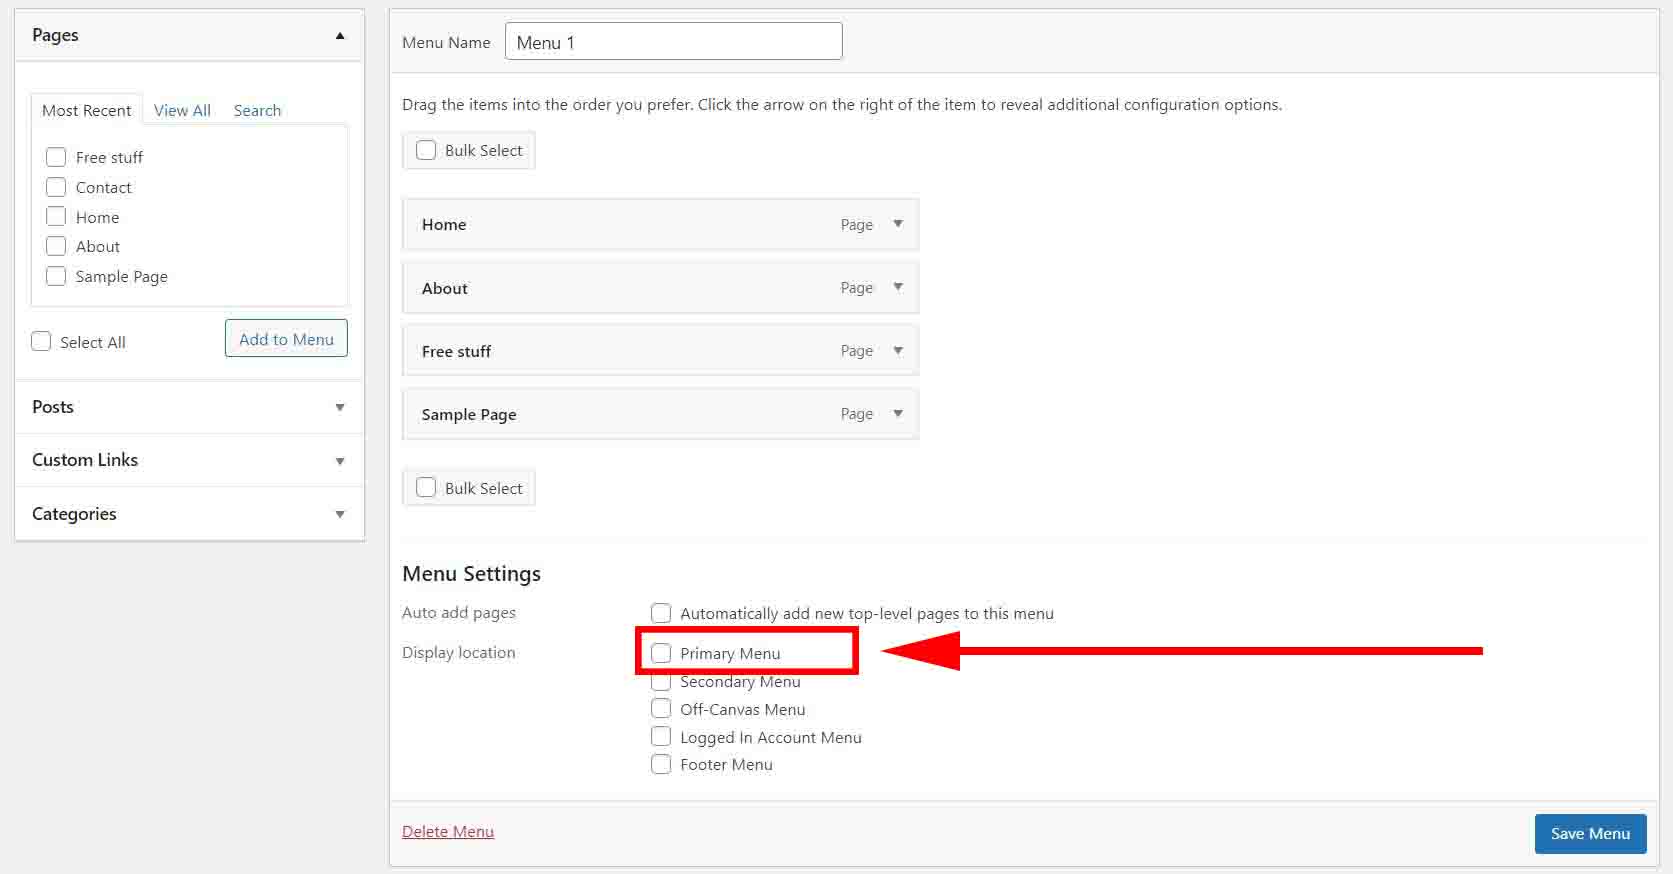
Dependent on your theme and if you’re a premium package, how many menus you can make and what you can do with them will differ.
For now, click on the primary link option for the display location.
How to add pages and posts to your menu
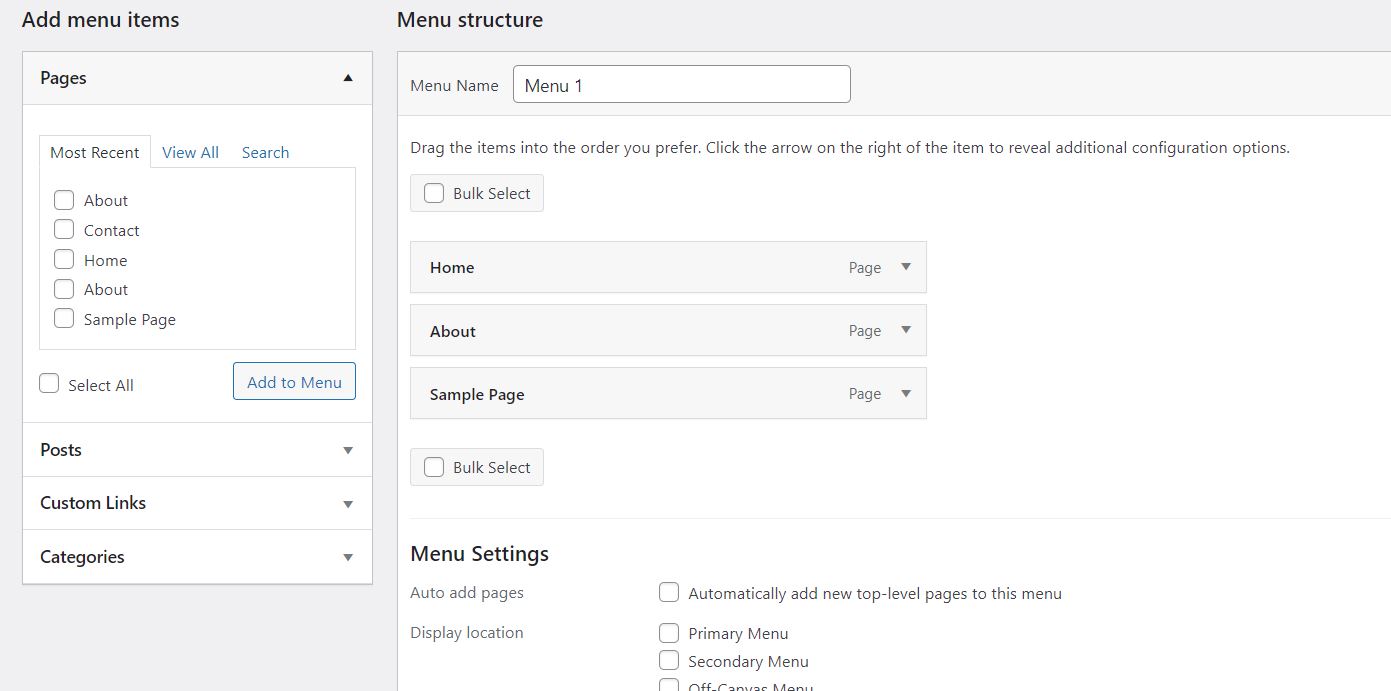
Underneath “Add Menu Items” you can choose what you want to add to your menu.
You can add pages, posts, individual links, custom links, and category links.
Every section contains all the posts, pages, and links you have created. You can add a piece of content by clicking on the square next to it and pressing add to the menu.
After doing that, the content page will appear on the right under the menu structure.
You can also reorganize pages on the menu by clicking while holding it in the menu and moving it around.
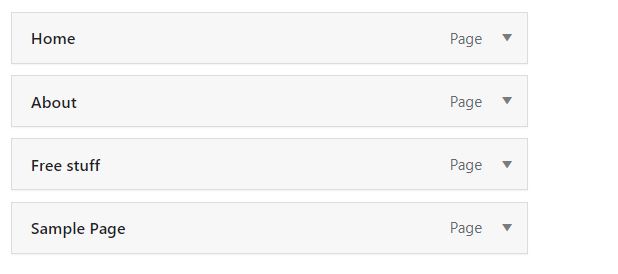
Using the menu editor, you can add all types of content to your menu.
Create a color palette for your website
It’s time to start looking at the design of your website and start putting the “furniture” in your house.
The first thing we’re going to look at is branding through colors.
The colors you pick are important because it contributes to people recognizing your brand.
A great tool that you can use for finding great color combinations is CSSdrive.com.
They have an image to colors palette that you can use to create a palette for your website.
You simply go to http://www.cssdrive.com/imagepalette/
Insert an image with the colors you’d like to use and you’ll receive a palette that you can use for your website.
After that, log into your WordPress dashboard.
Go to Appearance ⇒ Customize
You'll now see your webpage with a side menu to the left.
In the side menu that appears, they gave every element a name.
Go to color in the menu.
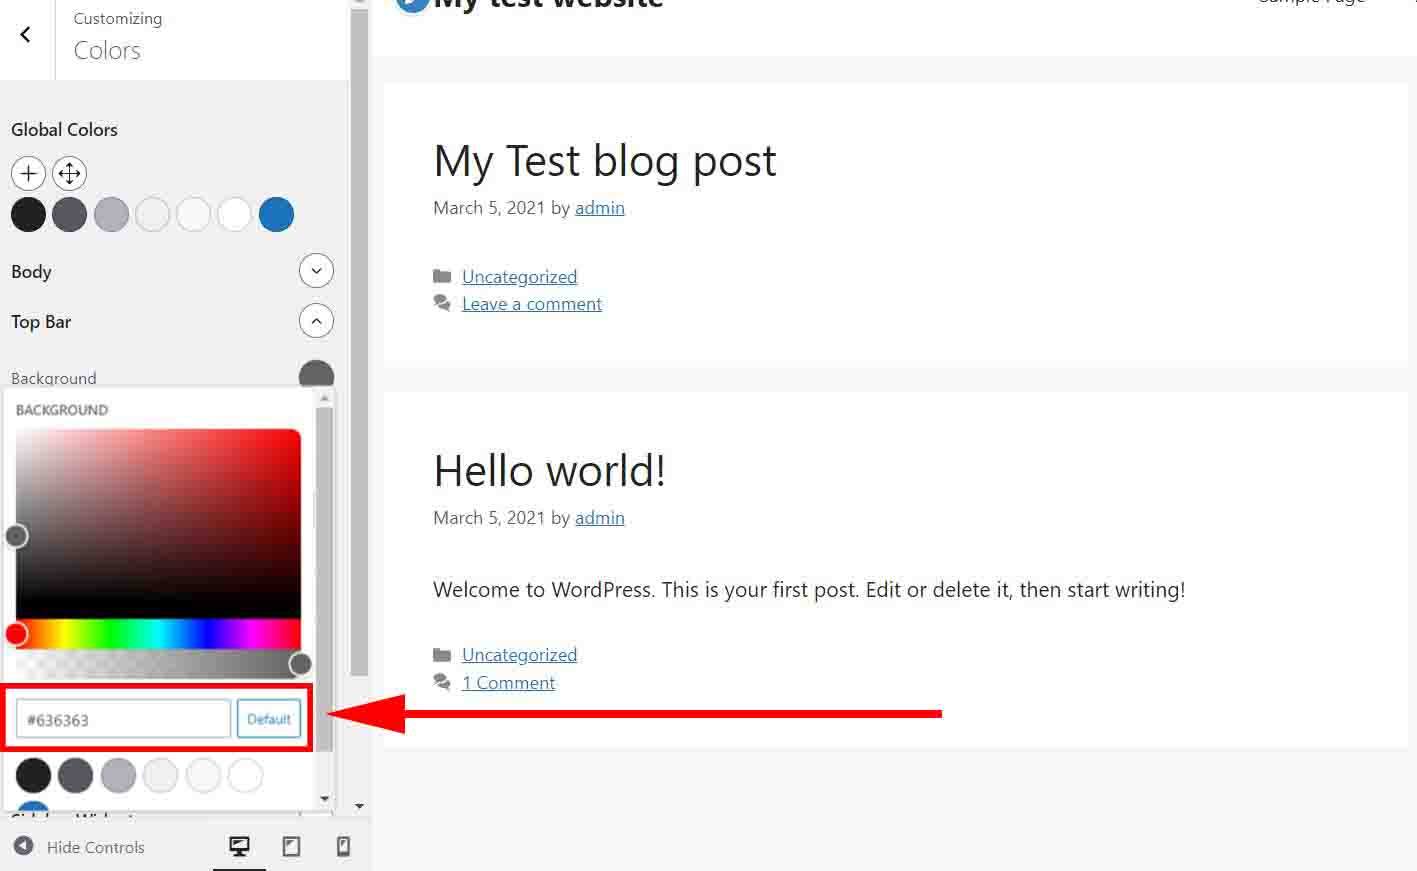
Now click on the name of the element you want to change the color of.
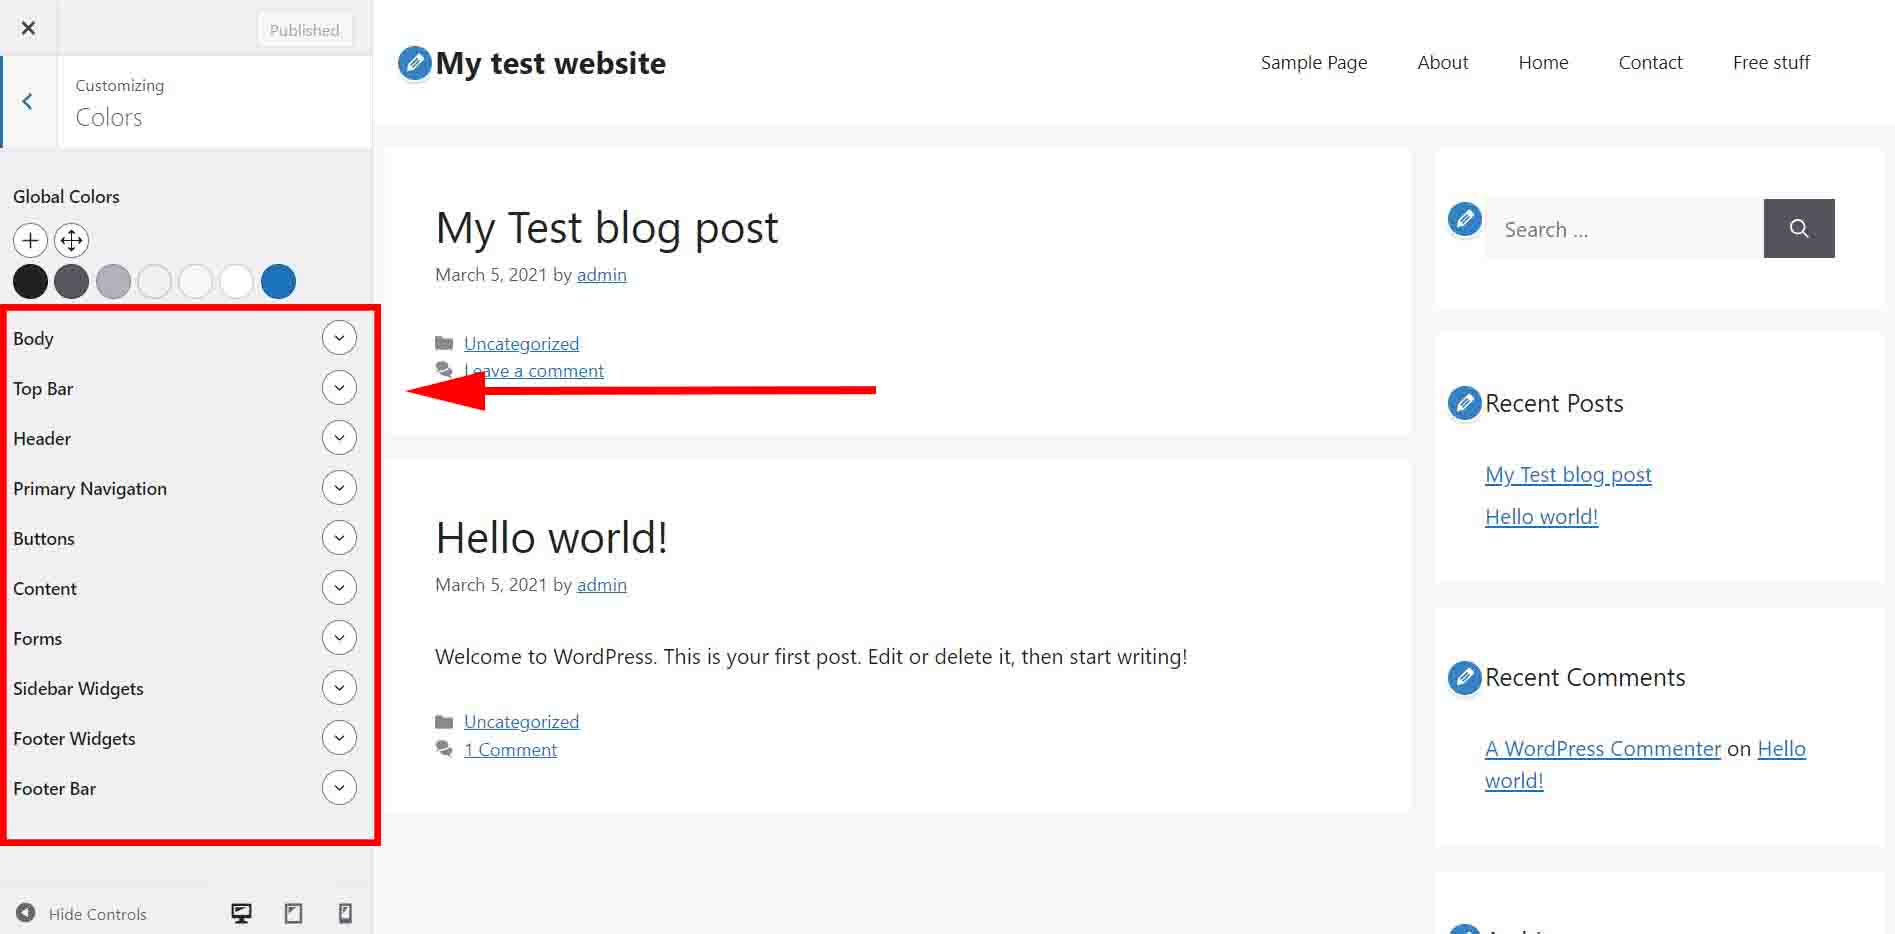
Here you can choose colors available or fill in the color codes you got from CSS Drive.
Design a logo
I advise creating a logo for your website. It shows that you’re serious about building your website.
There are multiple methods you can use for creating your logo.
1. Use an online editor
These online editors do all the design work for you.
A few websites that possess online editors that you can use are flamingtext.com and cooltext.com.
These will be simple edited text logos but depending on what type of text you choose can work well for a website.
2. Photoshop or other editing software
I used Photoshop to create my logo and if you’re skilled with Photoshop you could do that as well.
Being able to work with Photoshop is a great skill but if you’ve no experience I wouldn’t recommend learning it just to create a logo.
I’d rather go with Canva since it’s a lot more simple to create a logo.
3. Fiverr
Fiverr is a freelance platform on which you can hire a graphic designer to create the logo for you. There are a lot of graphic designers that’ll do it for a price as low as $5.
Install plugins for your website
What is a plugin?
A plug-in is a piece of software that adds new features or extends functionality to an existing application.
We’re going to download a few free plugins that are needed to run our website.
1. Pretty Links
Pretty Links is a free WordPress plugin URL shortener, link cloaker, branded link, and QR code generator to shrink, cloak, track, organize, and test all your links.
We need this plug-in because most affiliate links we get are obnoxiously long. We’re going to use it to shorten our affiliate links.
Log into your dashboard
go to plugins ⇒ Add New
In the search bar type in Prettylinks and download it.
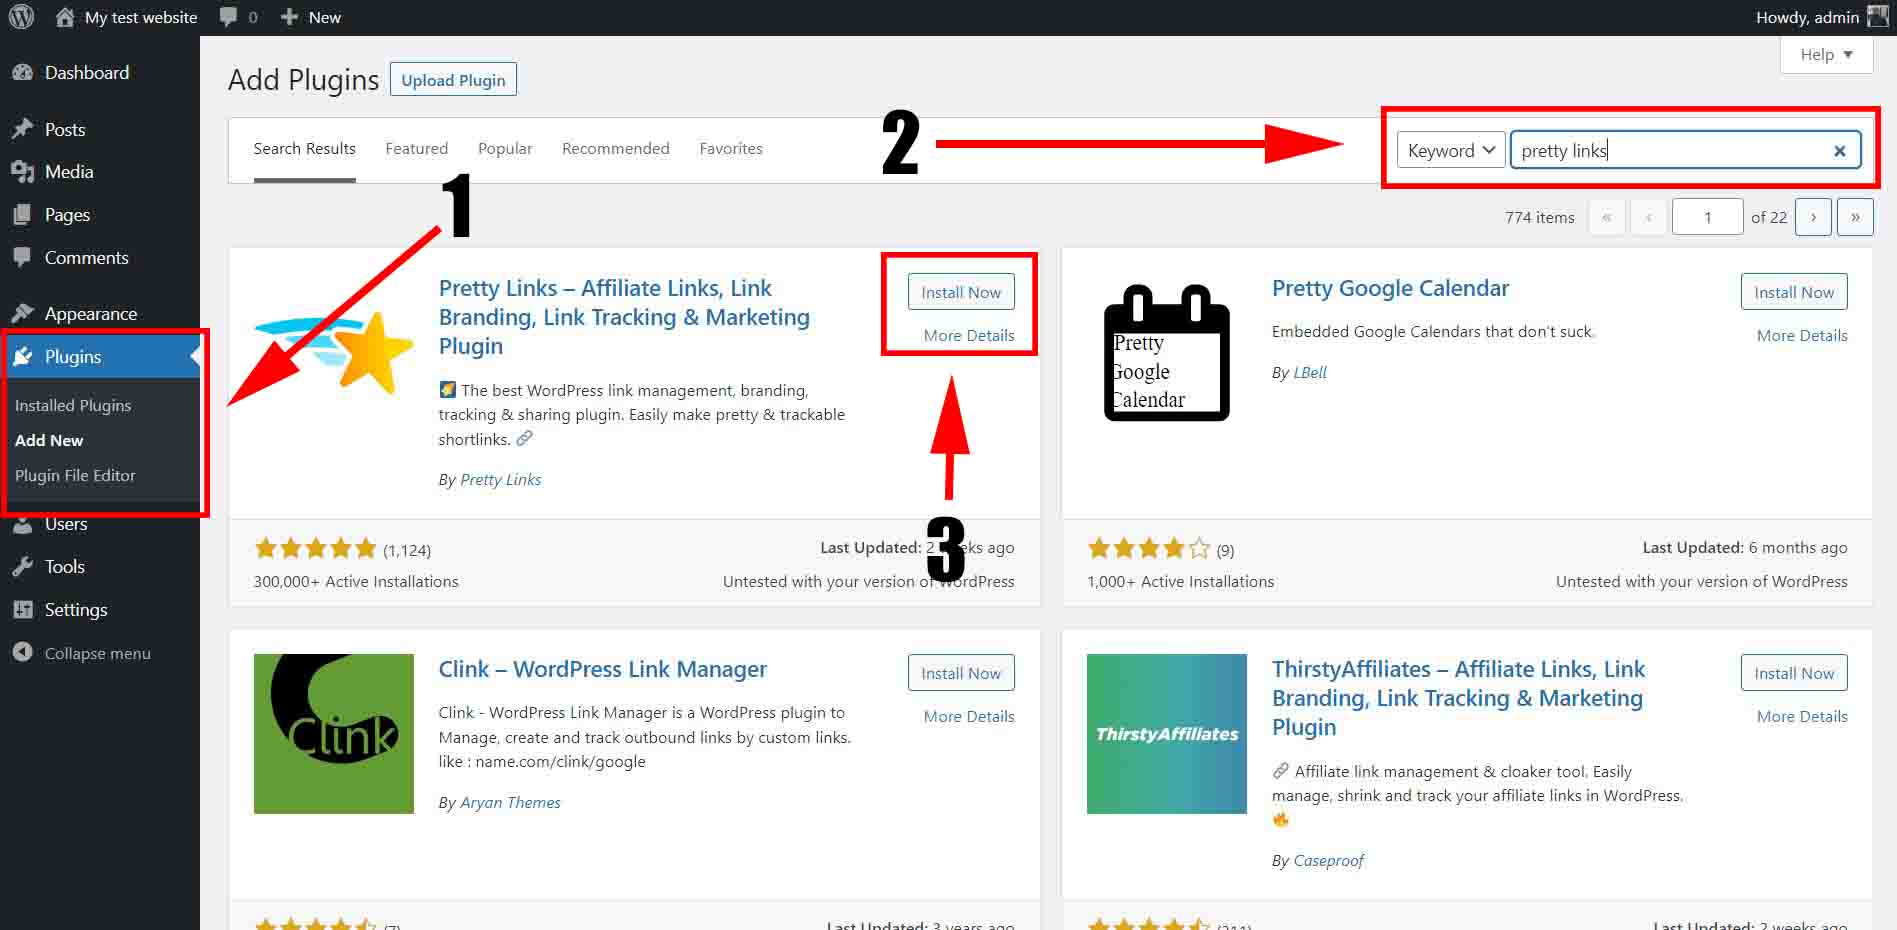
After you have downloaded you can activate Prettylinks.
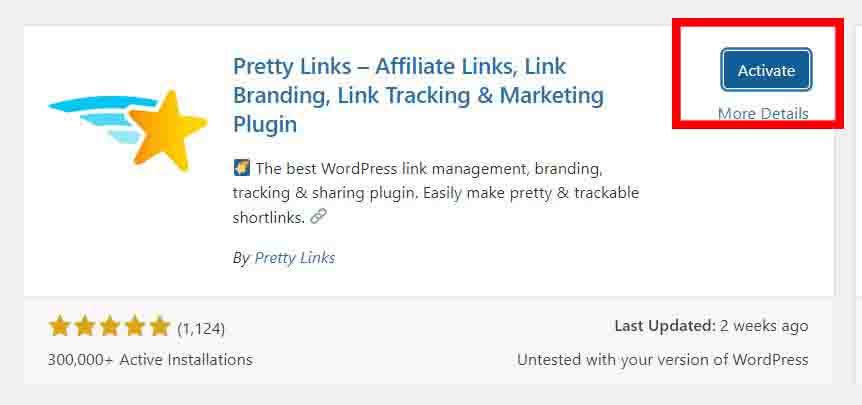
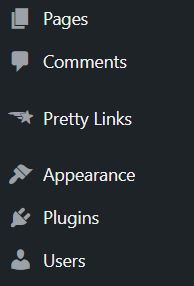
Pretty Links will now appear in the side menu of your dashboard.
After it becomes a clickable option, you can go to pretty links through it.
When you click on Pretty Links, you'll be directed to the dashboard of the
Pretty Links plugin.
In this area you can manage all the links you're going to create.
Go to add new.
Give the link a title
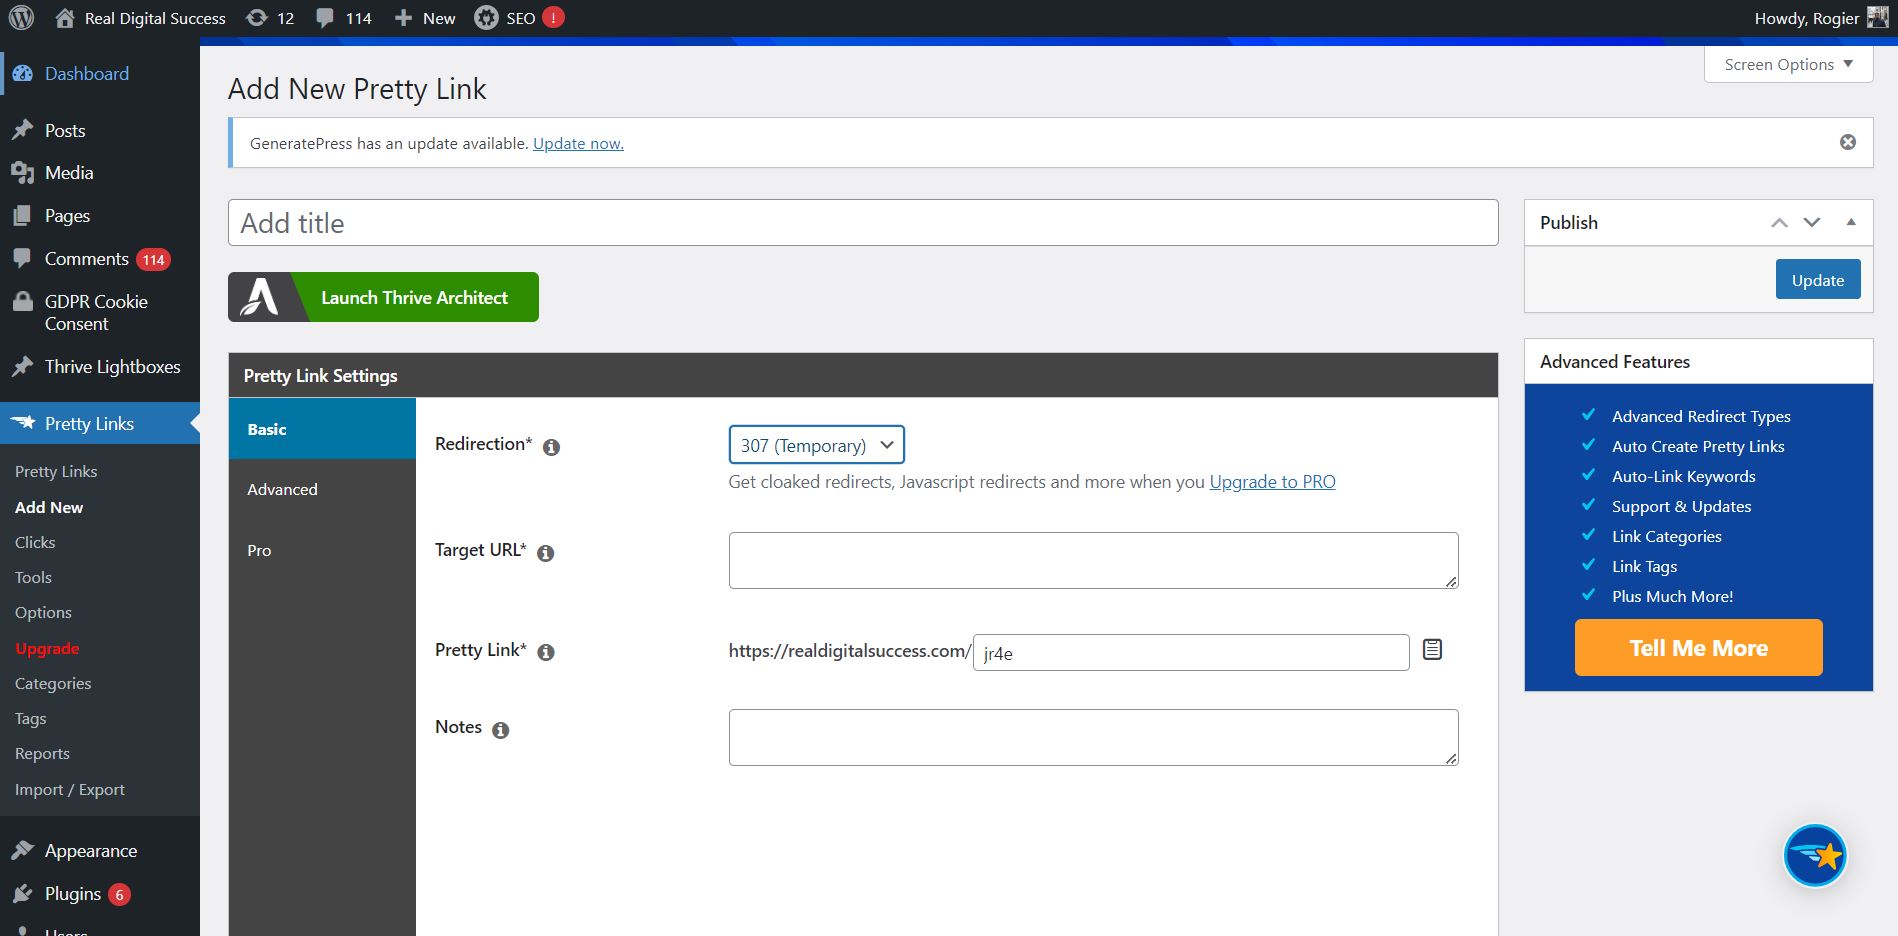
choose what kind of redirection you want to take place when people click on the link you’re going to make. You can choose a permanent or a temporary redirection.
I mostly go for temporary redirections just in case I want to change something about the link.
After that, you insert the affiliate link you got from an affiliate program in the target URL field and come up with a fitting name for the pretty link.
I like to name them after the product I’m promoting so it’s clear for everyone that sees the link where they’ll be directed to.
Since the beginning of the link is still your website URL it also eliminates the fear of being sent to a shady website.
2. All-in-1 SEO
What is all-in-one SEO?
All-in-One SEO (AIOSEO) is the original WordPress SEO plugin that helps you improve your website SEO (search engine optimization).
It makes it able to perform SEO without needing to code anything on your website.
I’ll get into how we’re going to use it in a later lesson but for now, go to plugins and download and activate it in the same way you did pretty links.
4. Imagify
Imagify is a great image compressor and the ultimate solution to optimize images.
You can resize and compress images (in bulk) from the most common image formats as well as PDF format. Images affect load time so we’ll minimize the load time of your website with this plugin.
5. Real Simple SSL
Really Simple SSL will automatically configure your website to use SSL to its fullest potential. It’ll switch all your HTTP URLs to HTTPS URLs.
Use extra hardening features to secure your website, and use our server health check to keep up-to-date.
You just need to download it and everything happens automatically after activating the plugin.
Tasks For Today
Task 1: Create a color palette
Think of the colors you’d like to use for your website and create a palette. This palette will represent your brand.
Task 2: Create your logo
Use 1 of the 3 methods I’ve mentioned to create your logo after deciding what type of colors you want to use for your website and your brand.
Task 3: Download Plugins
Download and activate all plugins mentioned in this lesson.
That’s all for today.
We have created the foundation for our website and added a few furniture pieces.
Tomorrow we’ll continue with adding more “furniture” to the website.
See you at my next lesson.
© 2023. Real Digital Success, All rights reserved.
