Today, we’re going to focus on installing the 2 most important tools any website owner should have.
Google Analytics and Google Search Console.
I’ll give you a step-by-step explanation that you can follow and I’ll also share with you why these 2 applications are important and what they’re capable of.
These are free services available for everyone so you don’t have to worry about purchasing these services.
Let’s get into it!
Your 11-Day Email Schedule
- Day 1: Welcome to the 11-day Affiliate Course
- Day 2: How to pick a profitable niche
- Day 3: How to pick an affiliate product
- Day 4: Building Your Income-Generating Website
- Day 5: Building Your Income-Generating Website (Part 2)
- Day 6: Marketing Your Website: On-Page SEO
- Day 7: Creating Your First Content
- Day 8: Marketing Your Website: Off-Page SEO
- Day 9: How To Monitor Your Performance
- Day 10: Double Your Earnings With Email Marketing
- Day 11: Easy Wins While You’re Gaining Authority
Important* Make sure you have done all the previous steps
before going to the next lesson.
Resources Mentioned in This Lesson
- Google Analytics (Google Product)
- Google Search Console (Google Product)
What is Google Analytics?
Google Analytics is a platform that collects data from your websites and apps to create reports that provide insights into your business.
In particular, Google Analytics tells you:
- Who visited your website and when
- What visitors are doing on your website
- How visitors discover your website
- How visitors interact with your website content,
- etc.
This information is incredibly useful for creating and tweaking your marketing strategy.
Installing Google Analytics
1. Create a Google Analytics account
You need to create a Google Analytics account. For this, go to analytics.google.com.
From there, two cases arise:
You already have a Google account: log in with your credentials.
You don’t have a Google account: Create a new account by clicking the “Create account” button.
Fill up the information, including your name, email address, password, and related information (date of birth, mobile number, location, etc.).
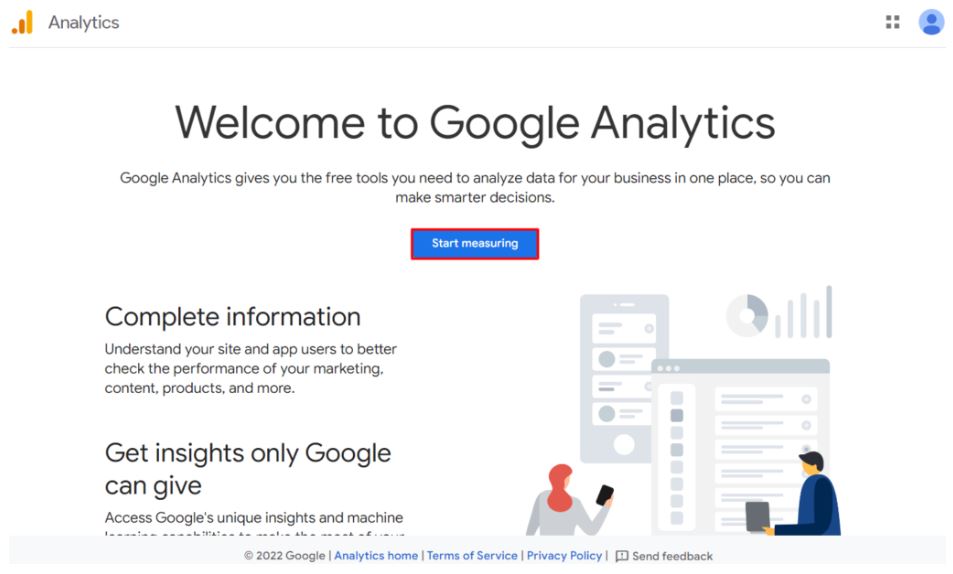
Once you’ve created your Gmail account, open the Google Analytics homepage and click the Start measuring button.
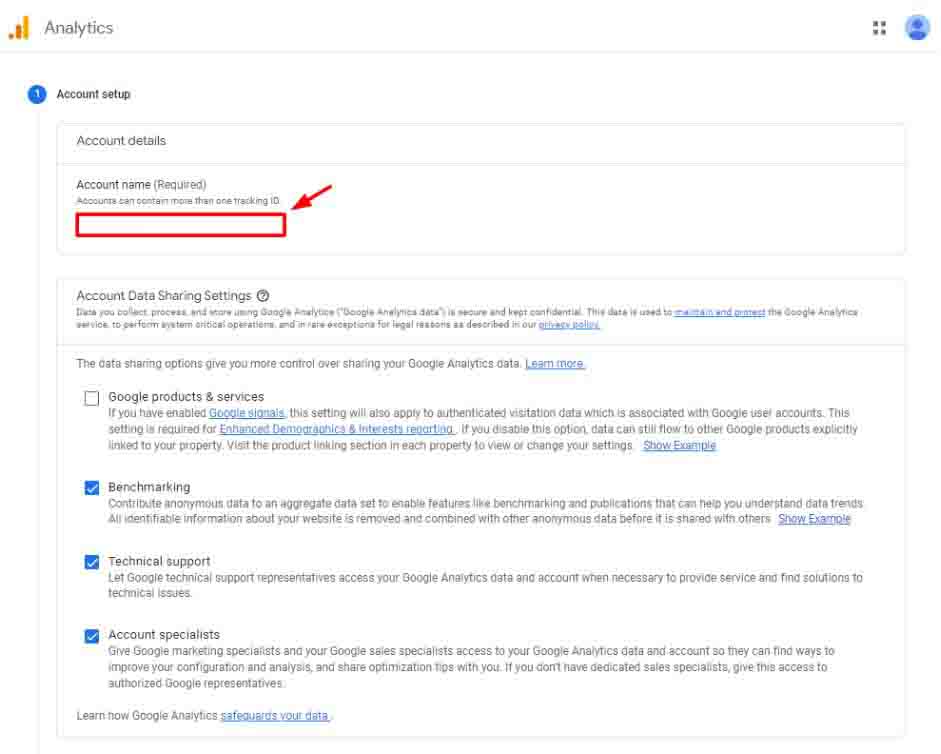
You will see the Account Setup screen.
Fill in the account name and select the Account Data Sharing options.
Click Next.
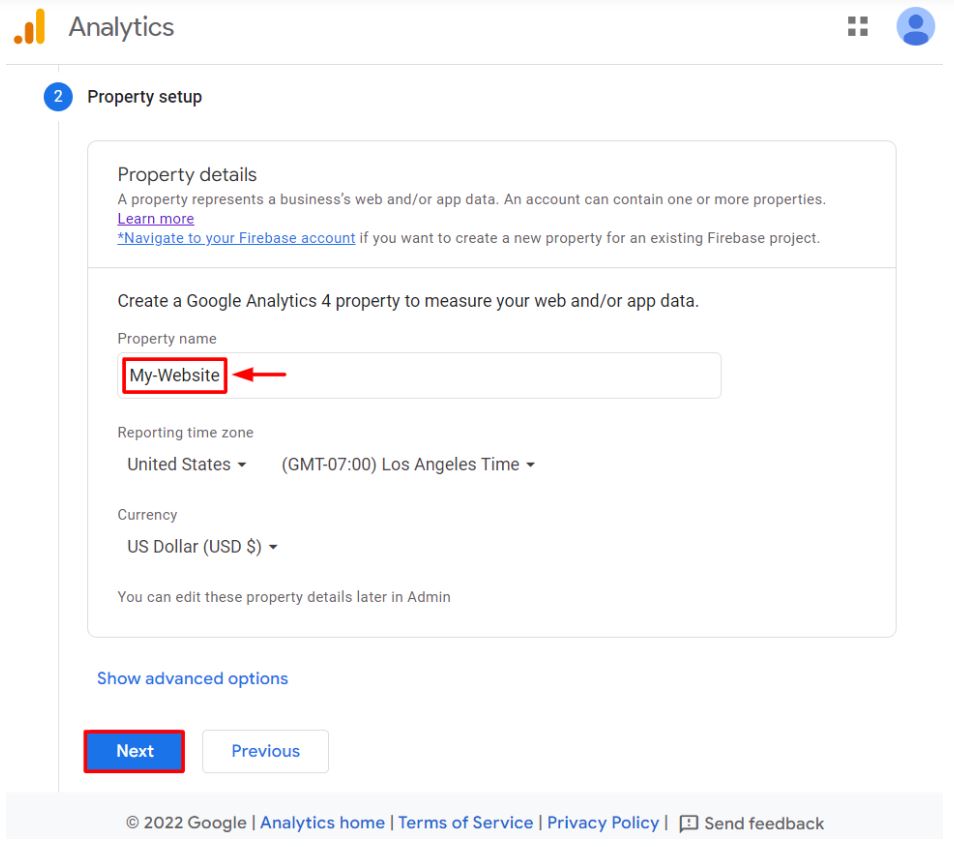
You will see the property setup screen that lets you choose the reporting time zone, currency, and name.
Fill in the information and click Next.
You will see the About Your Business form that asks you to select your industry category, business size, and intent to use Google Analytics.
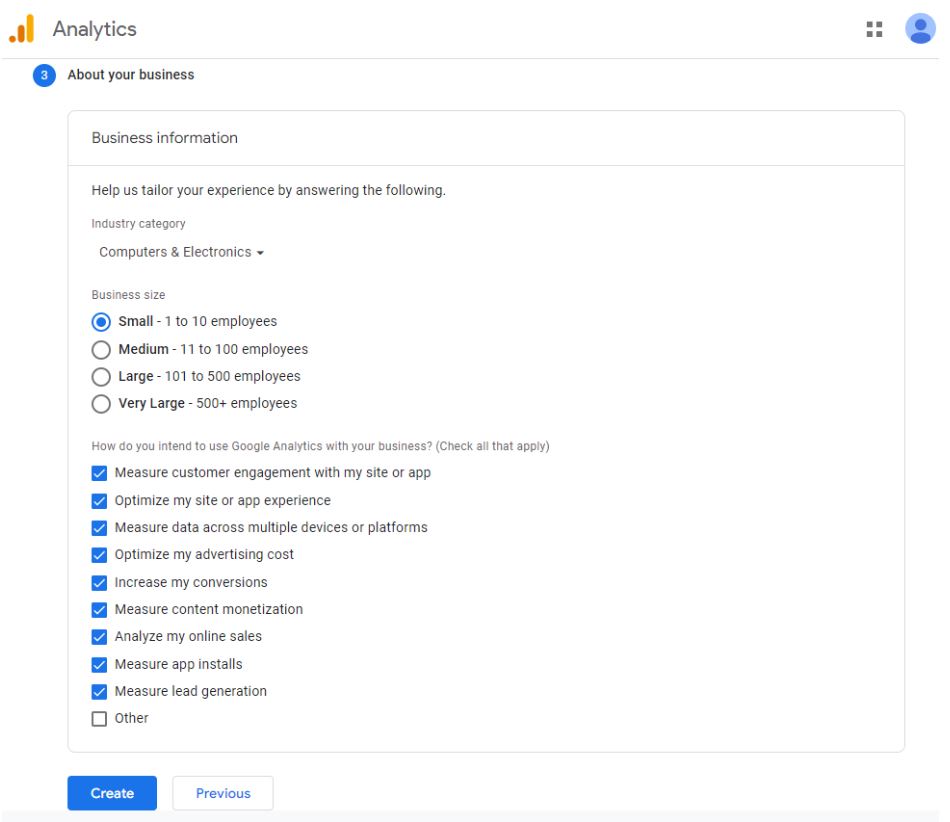
Once you click the Create button, the Google Analytics Terms of Service Agreement popup will appear, prompting you to accept their terms and conditions.
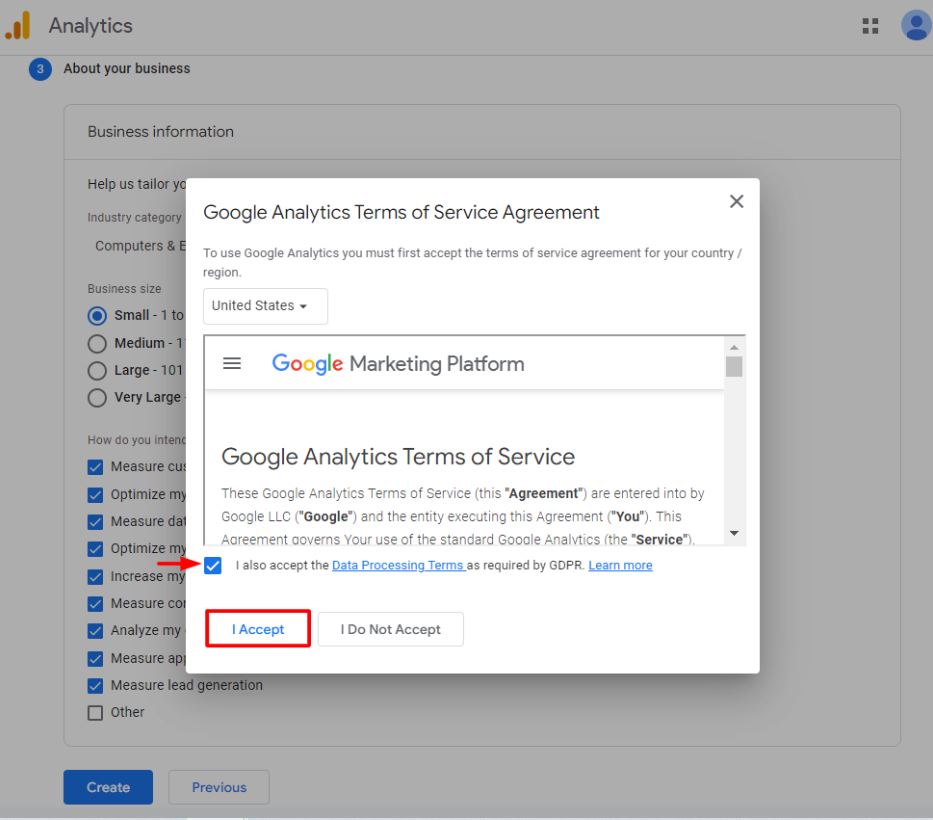
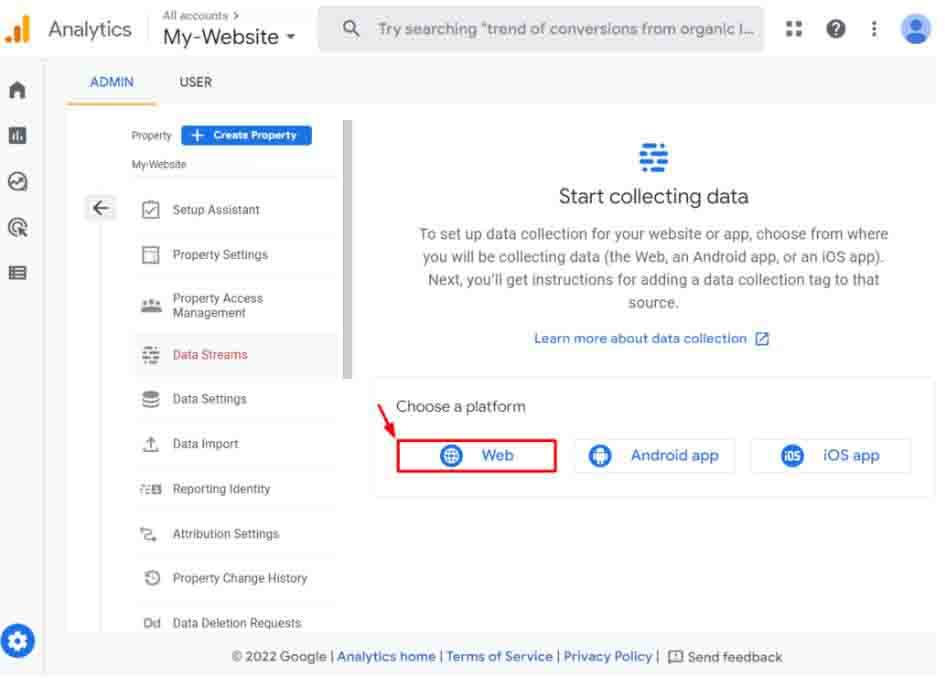
In data streams, choose your preferred platform to collect the data.
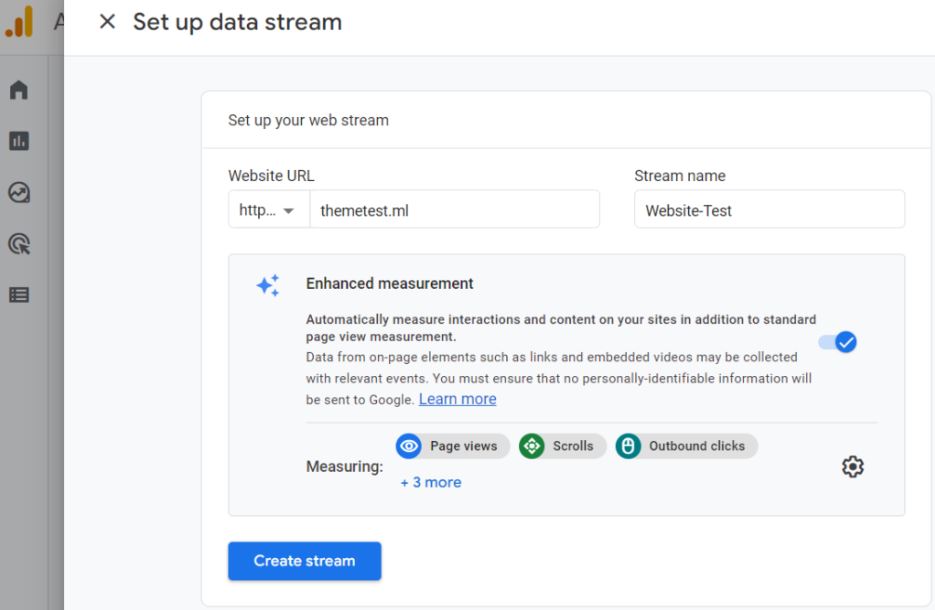
Set up the data stream by adding your Website URL and Stream name, then click on the Create Stream button.
You’ll see the Web Stream Details screen, showing that the web stream is created, but the data collection isn’t integrated and active, indicating you to install Google Tag on your WordPress site.
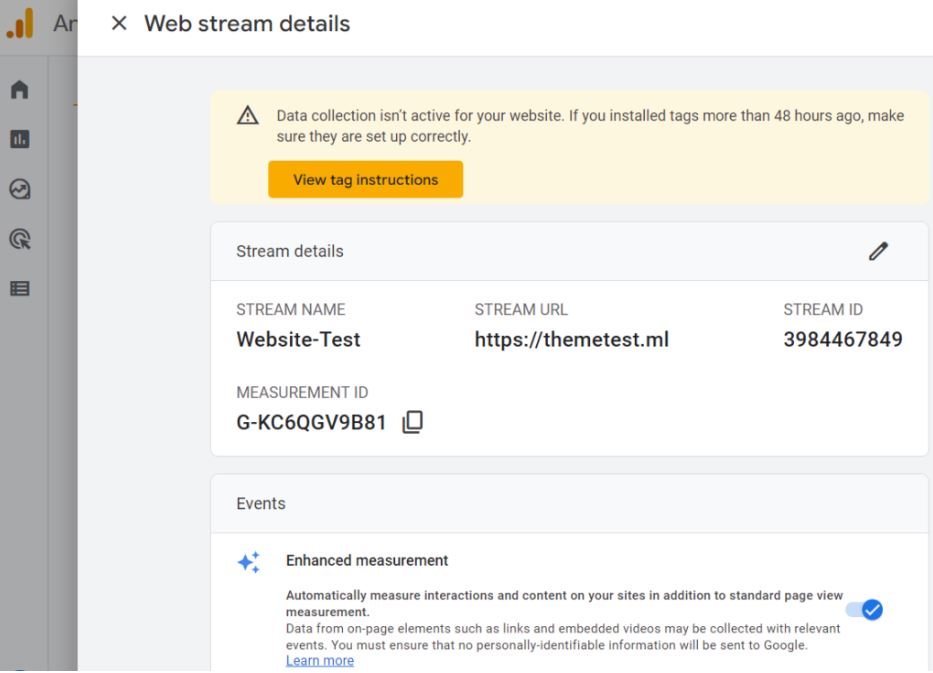
And here’s how you can add a Google tag:
Click the View Tag Instructions button, and you’ll see two ways to add the tag:
1) Install with a website builder or CMS.
2) Install manually.
When you add the tag to your website, Google will start tracking the data to your Analytics dashboard.
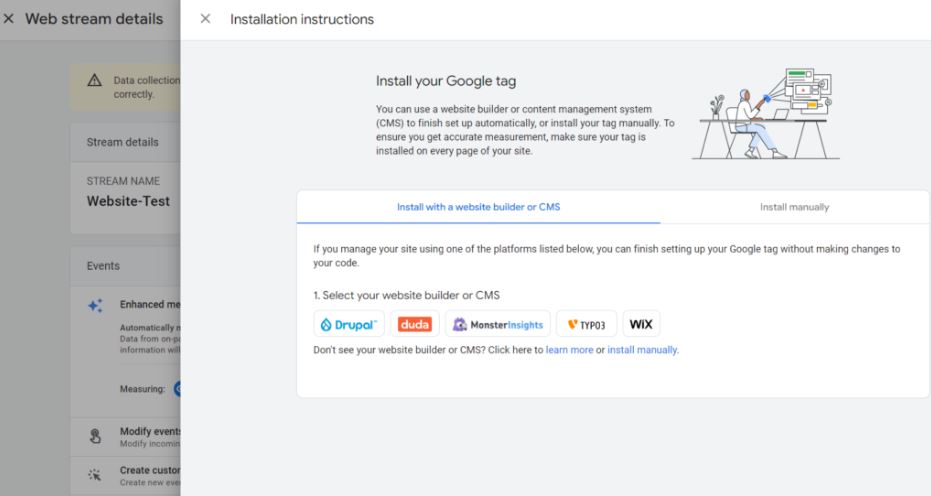
How to add Google Analytics To Your WordPress
What is Google Tag Manager?
To explain what Google Tag Manager is we first need to know what a tag is.
The Google tag lets you send information from your website to linked Google product destinations.
The information that is being sent is used to measure the effectiveness of your website and ads.
Google Tag Manager makes it possible to have all the tags in 1 place so you don’t lose overview and can easily make changes if necessary.
Using Google Tag Manager
Connect Google Analytics to a WordPress website using a Google Tag Manager.
Here's how you do it:
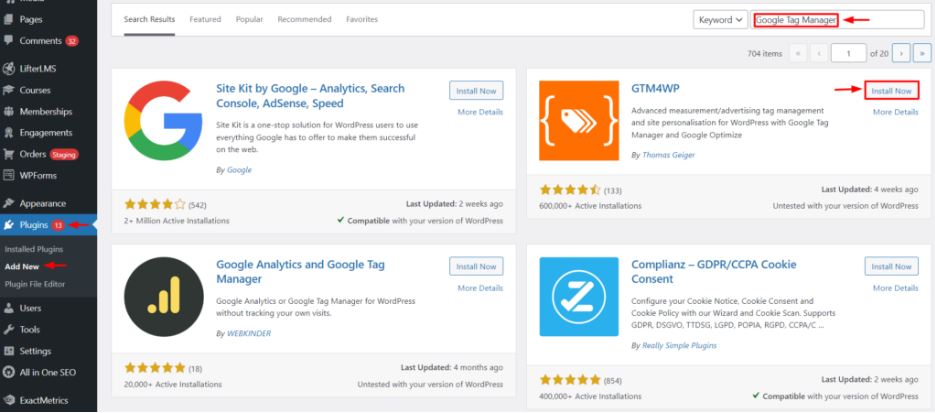
Go to your WordPress dashboard.
Click Plugins → Add New.
Search for “Google tag manager” in the text field.
Install and Activate the plugin.
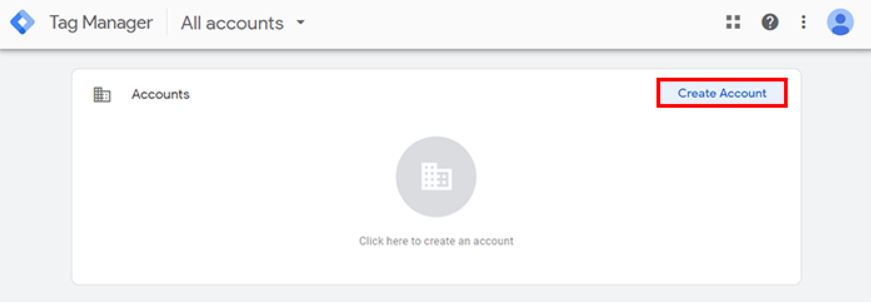
Visit Google Tag Manager and click on the “Create Account” button if you have not already signed up.
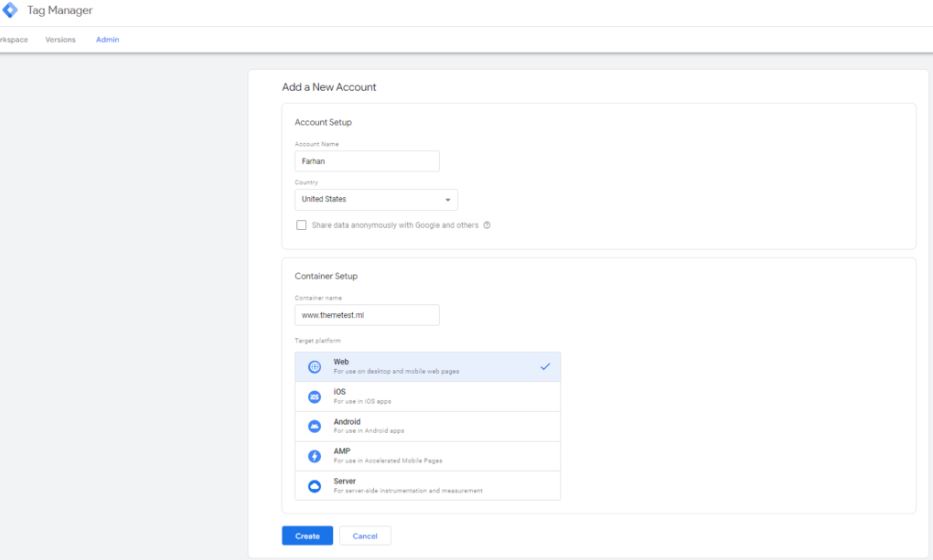
Enter the required details, including Account Name, Country, and Container Name, and click the Create button.
Read the Google Tag Manager’s Terms of Service Agreement and mark the agreement to continue.
Once you complete the signup process, you will see the Google Tag Manager snippets.
Click the OK button to get your Google Tag Manager ID.
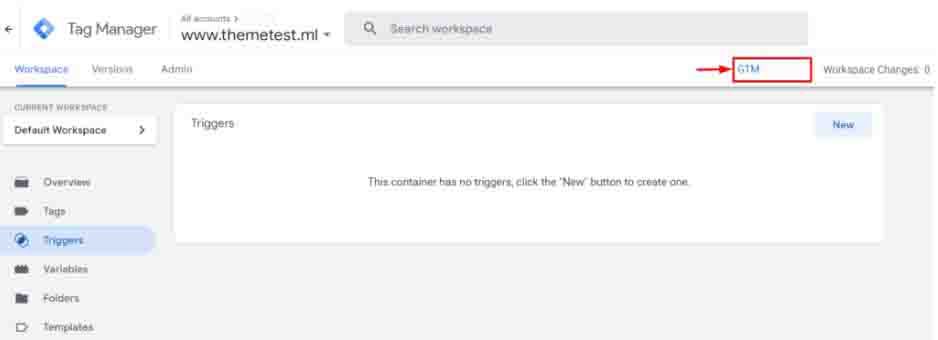
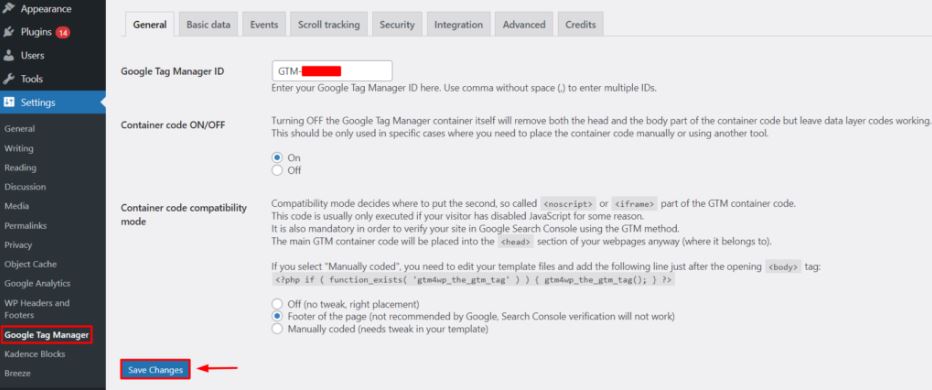
Go back to the plugin’s settings, and paste your Google Tag Manager ID.
Click the Save Changes button.
Congratulations!
You have successfully installed Google Analytics via Google Tag Manager.
What I'd recommend from here is to take a look at Google's analytics academy.
It's a website showing all the features both basic and advanced. There's a lot of cool stuff you can do with analytics to get the most out of your traffic.
>>> Take a look at Google's analytics academy
What is Google Search Console?
Search Console tools and reports help you measure your site's Search traffic and performance, fix issues, and make your site shine in Google Search results.
Unlike Analytics which is focused on the users, Search Console is predominately focused on traffic and related information coming from search engines.
In particular, Google Search Console tells you:
- The index status of your pages Crawl information
- What pages have errors that get in the way of indexing and ranking
- The average ranking of your content
- How many visitors click on your content
- How many visitors have been on the result page containing your content?
- Find out if you have been penalized by Google
- etc.
How to install Google Search Console
Step 1. Add your website to Google Search Console.
You will need to visit the Google Search Console site and choose Start Now:
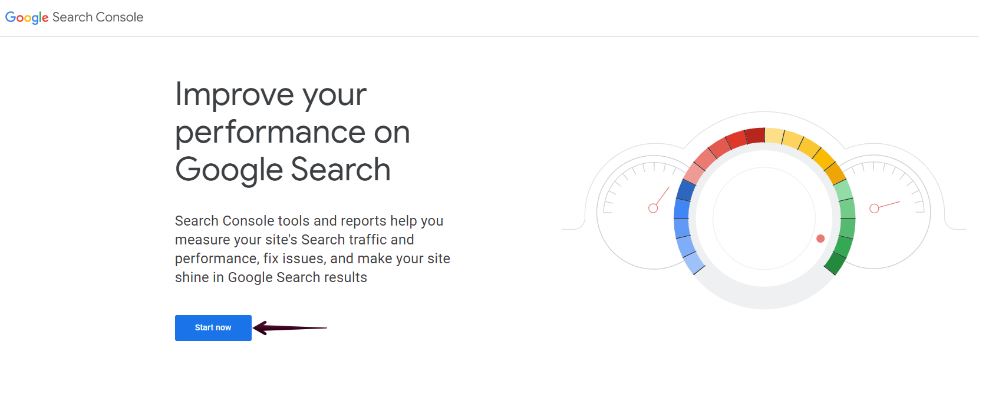
You will be redirected to another page from which you can choose the specific Google Account from which you want to manage your Google Console.
After you select the specific Google Account, you will need to choose the property type URL prefix and type in the name of your website to Continue:
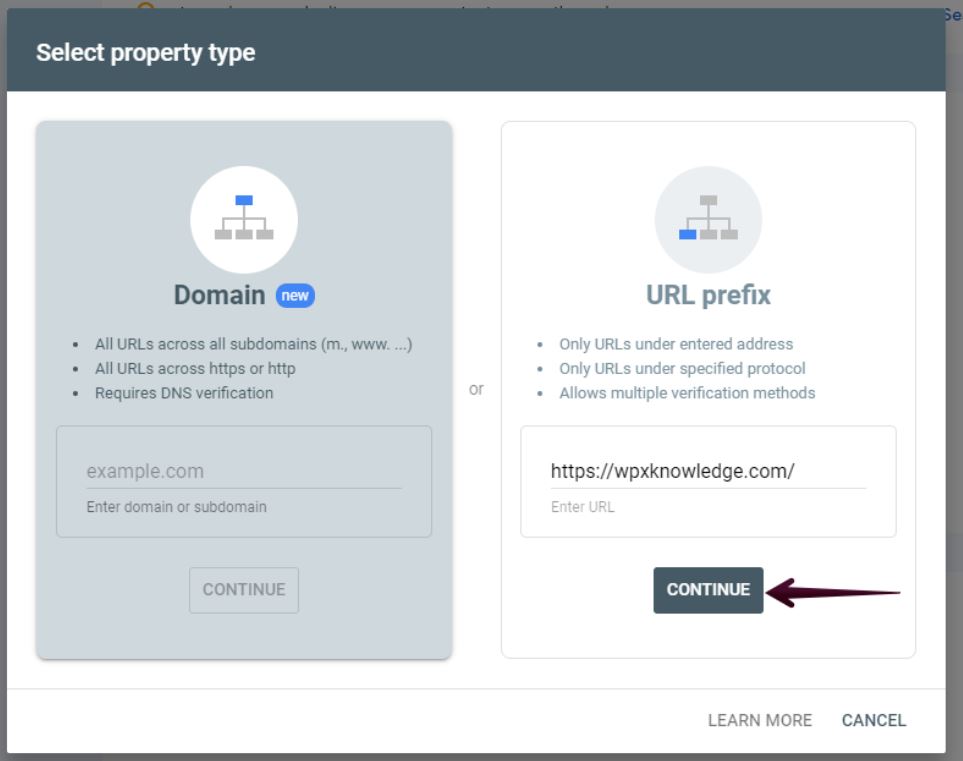
Specify the URL exactly as it appears in the browser bar, including the final / (forward-slash) mark.
Step 2. Verify your website address via an HTML file.
To complete the process of adding a property to your Google Search Console, you need to verify it via one of the methods that are given.
The easiest way is to upload an HTML file to your site files. To do that, you need to download the file on your computer by clicking on it
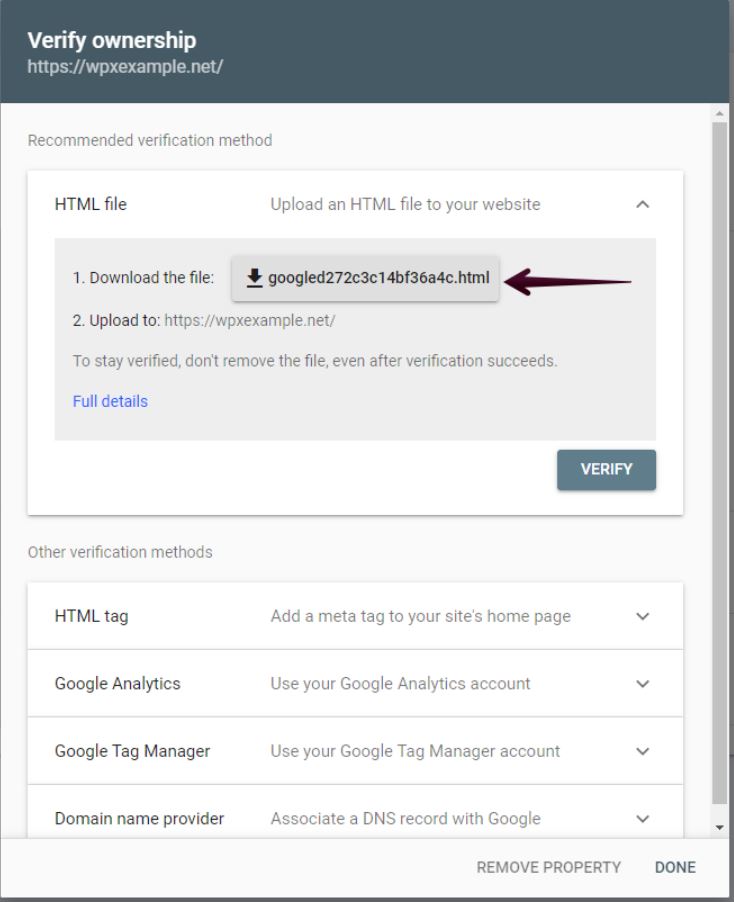
To upload it to your website’s files, you can use our integrated File Manager through your WPX Account.
Once you have uploaded the file, you can go ahead and choose Verify to complete the process:
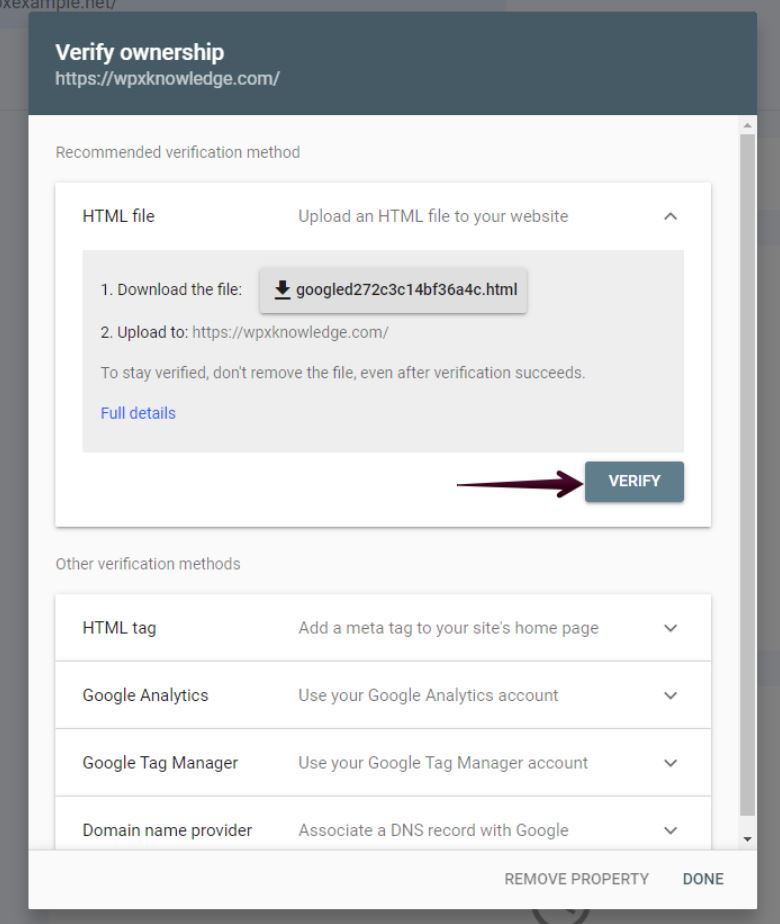
Make sure you add and verify separate Search Console properties for all URL variations that your site supports, including HTTPS, HTTP, www, and non-www.
Step 3. Add additional properties via Google Search Console.
To add additional properties for your new website address, you will need to navigate to the top left corner of your screen and select Search Property (1) and Add Property (2):

That’s it! You have successfully added and verified all website properties via Google Search Console.
That’s all for today.
If you haven’t already created your console and analytics account so you can see the performance of your website.
See you at the next lesson.
© 2023. Real Digital Success, All rights reserved.
